Try our free AI tools – no sign-up needed!


How to Compress an Image to 20KB, 50KB or 100KB (Free, No Upload)
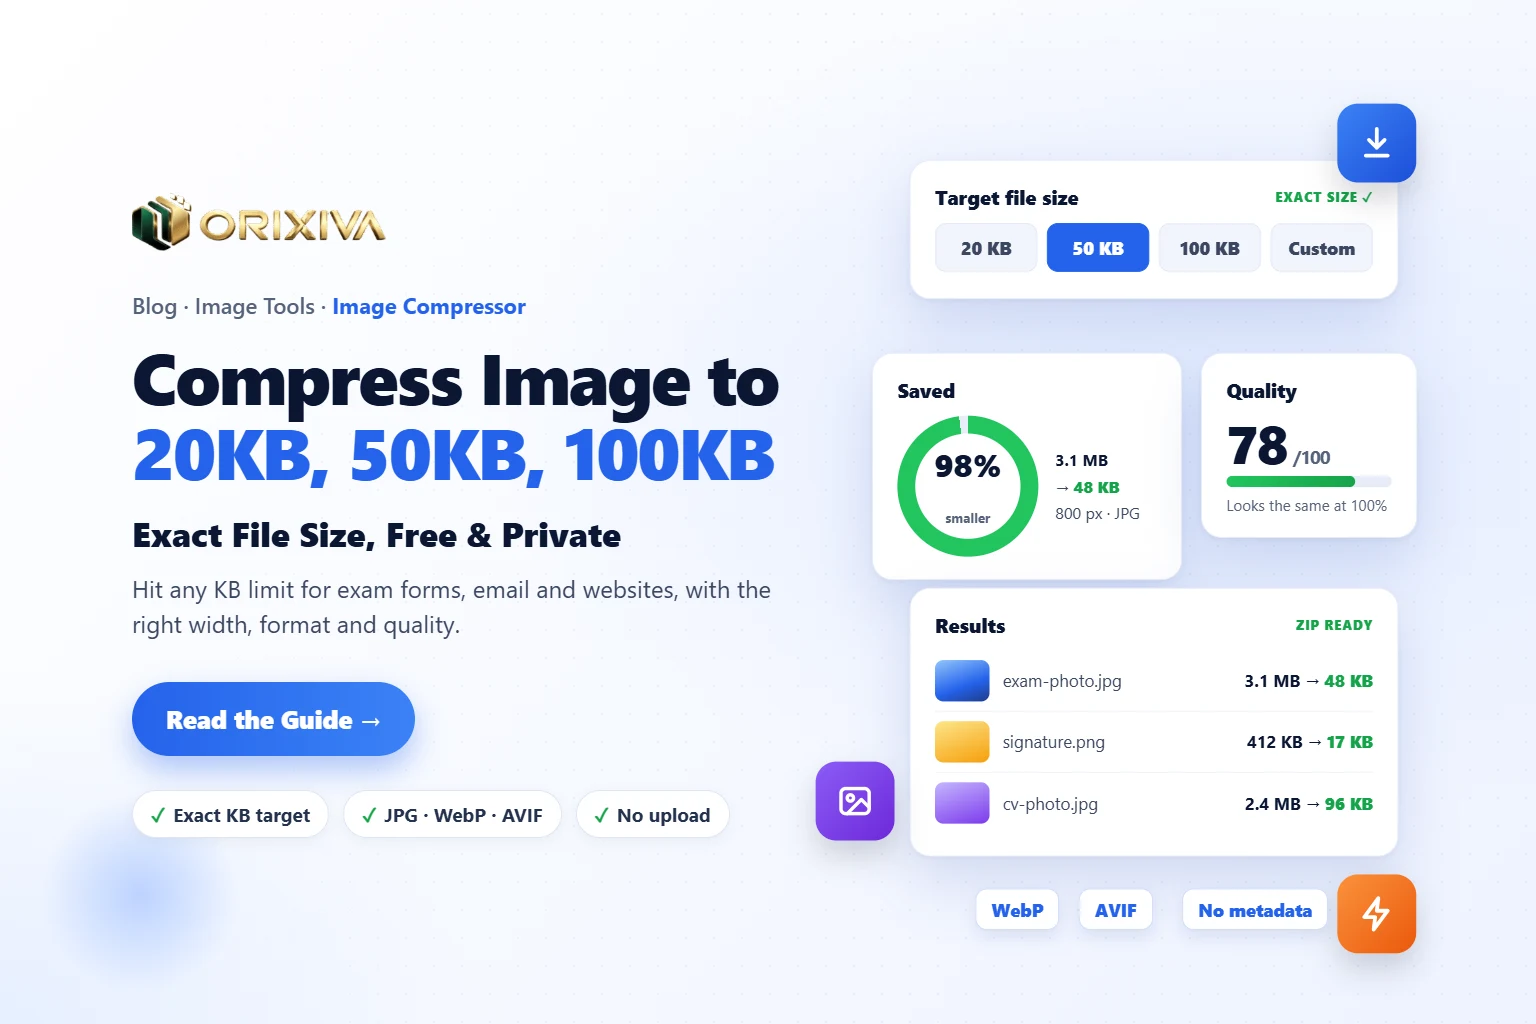
In a hurry? The free image compressor hits an exact size like 20KB, 50KB or 100KB in seconds, right in your browser.
Jump to the free tool ↓An exam portal wants a photo “under 50KB”. A job site rejects your scan because it is over 100KB. A form needs a signature of 20KB or less. If you need to compress image to 20KB, 50KB or 100KB, the trick is not one magic button: it is knowing which of four levers to pull, and in what order.
This guide explains those levers in simple words, gives you a size-by-size recipe with real numbers, and shows how to do it in the free Orixiva image compressor, which works on your own device, so your photo is never uploaded to a server.
Key takeaways
- File size depends on four things: pixel dimensions, quality level, file format and hidden metadata.
- For tiny targets like 20KB, reduce the dimensions first. Lowering quality alone makes faces blocky.
- As a rough guide: about 400–600 px wide for 20KB, 800–1,000 px for 50KB and 1,200–1,600 px for 100KB (JPG photos).
- Always remove metadata. It is free size, and it removes your GPS location too.
- Check the result at 100% zoom before you upload, and keep your original file.
What decides an image’s file size?
A KB (kilobyte) is about one thousand bytes, so 100KB is roughly a tenth of a megabyte. A photo straight from a modern phone is often 2–5 MB. Getting it to 100KB means making it 20 to 50 times smaller, and to 20KB, over 100 times smaller. That is possible, but only if you change the right things.
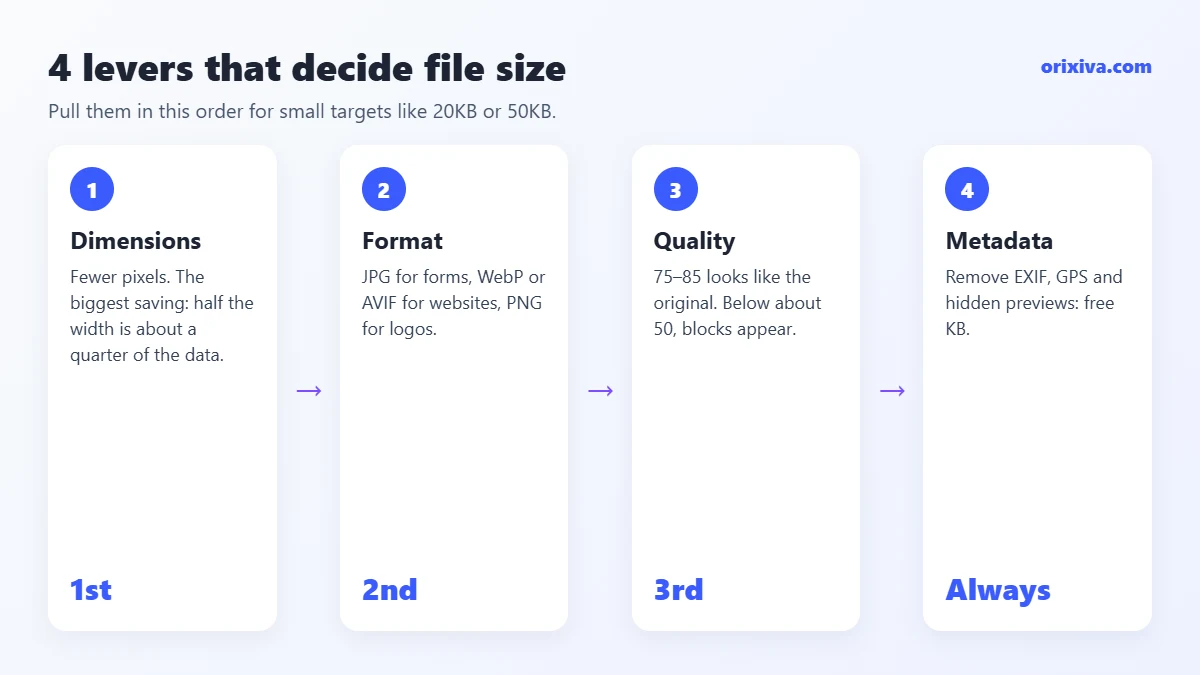
1. Dimensions (pixels)
A 4,000 × 3,000 photo has 12 million pixels. Halving the width and height leaves 3 million, about a quarter of the data. This is the biggest lever for small targets.
2. Quality level
JPG, WebP and AVIF throw away detail the eye barely notices. Quality 75–85 usually looks the same as the original; below about 50, blocks and smudges appear.
3. File format
The same picture can be very different sizes as JPG, WebP, AVIF or PNG. Photos suit JPG, WebP and AVIF; screenshots and logos often suit PNG.
4. Metadata
Camera model, date, GPS location and a hidden preview can add 10–60KB. On a 20KB target, that is often the whole budget.
The free image compressor works through these levers for you. You choose a target, it searches for the highest quality that fits, and it only shrinks the dimensions if quality alone cannot get there.
How to compress an image to an exact size (step by step)
These steps work for any target: 20KB, 50KB, 100KB, 200KB or a custom number. They match the screens of the free Orixiva tool.
- Add your image. Open the image compressor and drop a file, click Choose images, or paste a screenshot with Ctrl+V. JPG, PNG, WebP, AVIF, GIF and BMP work, up to 40 images at once.
- Pick “Exact file size”. Under 1. Goal, choose the 🎯 Exact file size mode and tap 20 KB, 50 KB or 100 KB. For anything else, choose Custom and type a number in KB or MB.
- Choose the format. Leave Same as original (smart) if the website only accepts what you uploaded. Choose JPG when a form says “JPG/JPEG only”, or WebP for your own website.
- Set a sensible width. For small targets, open Resize and choose Set width (keep ratio). Use the size table in this guide as a starting point.
- Remove metadata. In 3. Advanced settings, keep Remove all selected. It makes the file smaller and strips your GPS location.
- Compare before and after. Open the before/after view and zoom to 100% or 200%. Look at eyes, text and edges. If it looks rough, allow a slightly larger width or a higher size limit.
- Download. Save one file, or press Download all (ZIP) for a batch. Check the size shown under each result before you upload.
Tip: use the safety floorThe Lowest quality allowed slider (40% by default) stops the tool from going so low that the photo falls apart. If the target cannot be reached above that floor, it tells you, instead of silently giving you a broken image. Tick Allow smaller dimensions and it will reduce the size a little to make it fit.
How to compress image to 20KB
20KB is common for signatures, small ID photos and older government portals. It is a very small budget, so the image must be small too. A 20KB photo at full phone resolution would look like coloured squares.
Recipe for a 20KB photo
- Width: 400–600 px for a photo. Passport-style photos are often requested at around 350–600 px wide anyway.
- Format: JPG (most forms accept only JPG). Remove all metadata.
- Crop first: cut away empty background. Every pixel you remove is budget for the face.
Recipe for a 20KB signature
Sign on white paper with a dark pen, photograph it in daylight, and crop tightly. A signature has very few colours, so PNG smart with 16 or 32 colours often lands well under 20KB at 600 px wide with sharper edges than JPG. If the form demands JPG, use JPG with a white background.
ExampleA 3.1 MB phone photo (4,032 × 3,024) set to “Exact file size: 20 KB”, width 500 px, JPG, metadata removed, gives a file of about 18–20KB that still shows a clear face. The exact result depends on the photo: plain backgrounds compress far better than busy ones.
How to compress image to 50KB
50KB is the most requested limit for exam and application photos, and the tool has a ready preset for it: 📝 Form upload (≤50 KB). One tap sets the goal, format and metadata for you.
At 50KB, a photo of 800–1,000 px on its longest side usually looks clean. If the portal states exact pixel sizes (for example 200 × 230 px), set those first; the file will then be far below 50KB with the quality kept high.
When the form asks for a range, like 20–50KB
Some portals reject files that are too small as well as too big. Set the target to the upper value (50KB) and check the result. If it comes out under the minimum, increase the width a little or switch off Never make a file bigger only if you started from an already tiny file.
How to compress image to 100KB
100KB is a comfortable size for job portals, email signatures, product listings on small shops and many website images. When you compress image to 100KB, a 1,200–1,600 px wide JPG or WebP usually fits at quality 70–80 and looks sharp on a laptop screen.
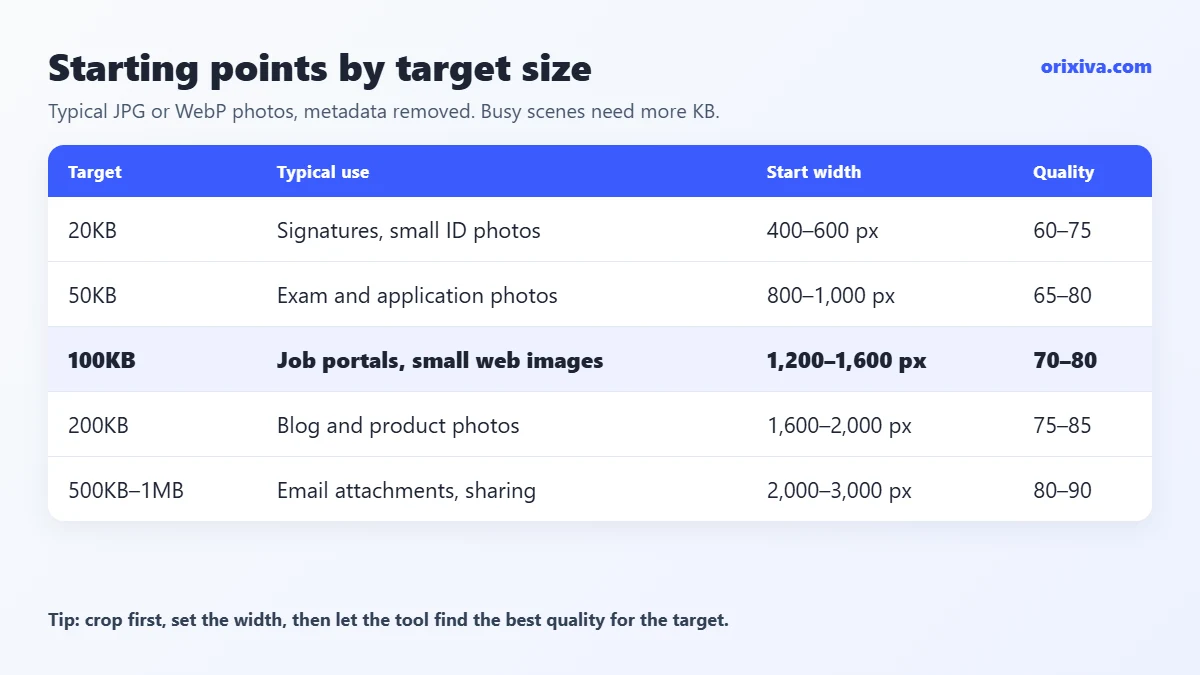
Starting points by target size
Typical photos, metadata removed. Your results will vary.
JPG / WebPTypical photos, metadata removed. Your results will vary.
| Target | Typical use | Start with width | Expected quality |
|---|---|---|---|
| 20KB | Signatures, small ID photos | 400–600 px | 60–75 |
| 50KB | Exam and application photos | 800–1,000 px | 65–80 |
| 100KB | Job portals, small web images | 1,200–1,600 px | 70–80 |
| 200KB | Blog and product photos | 1,600–2,000 px | 75–85 |
| 500KB–1MB | Email attachments, sharing | 2,000–3,000 px | 80–90 |
Busy scenes (trees, crowds, gravel) need more KB than plain ones (sky, walls, studio shots) at the same size.
Checklist: compress image to 50KB (or 20KB) for exam and job forms
Application portals are strict, and a rejected upload often means starting the form again. Run through this list before you open the image compressor:
- Read every rule. Note the format (JPG only?), the KB range (for example 20–50KB), the pixel size, the background colour and whether the face must fill a set share of the photo.
- Crop to the shape first. If the form asks for 3.5 × 4.5 cm or 200 × 230 px, crop to that shape before you compress image to 50KB, so the face is not squashed later.
- Set the exact pixel size. Use Fit inside max width × height with the numbers from the form.
- Choose the target. Pick 50 KB (or 20 KB) in the image compressor, JPG format, metadata removed.
- Check the file name. Some portals reject spaces or long names. Rename it to something short like photo.jpg.
- Keep both versions. Save the compressed copy for the upload and keep the original for the next form, which may have a different limit.
Signatures follow the same steps, with a white background and a tight crop. Most signature limits are 10–20KB, which is easy for a small, clean scan.
Compress image to 100KB for email and messaging
Email services limit attachments (Gmail allows 25MB per message), but large photos also fill the receiver’s inbox and are slow on mobile data. For everyday sharing, compress image to 100KB–300KB per photo at about 1,200–1,600 px wide. That keeps faces and text sharp on any phone or laptop screen.
The ✉️ Email attachment preset in the image compressor sets an 800 px width, which is ideal when you send many photos at once. For a single important photo, such as a document scan, choose 100 KB or 200 KB with a larger width so small text stays readable.
JPG, WebP, AVIF or PNG: which makes the smallest file?
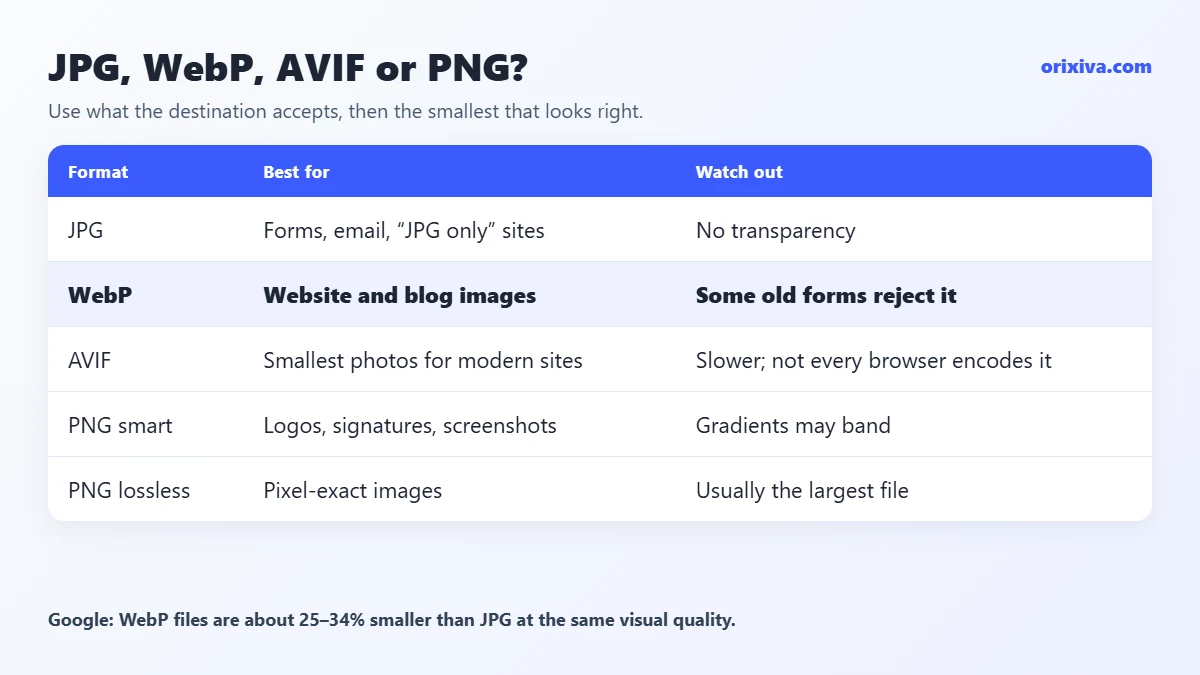
For photos, modern formats win. Google reports that WebP files are about 25–34% smaller than JPG at the same visual quality (Google WebP study), and AVIF is often smaller still. But a smaller file is useless if the website you upload to does not accept it.
| Format | Best for | Watch out |
|---|---|---|
| JPG | Photos for forms, email and anywhere “JPG only” | No transparency; text edges can blur |
| WebP | Website and blog images | Some old forms and apps reject it |
| AVIF | Smallest photos for modern websites | Slower to encode; not every browser can create it |
| PNG smart | Logos, signatures, screenshots, icons | Photos with gradients may band; use dithering |
| PNG lossless | When every pixel must stay exact | Usually the largest file |
In the image compressor, Same as original (smart) keeps your format but chooses smart settings. AVIF only works if your browser can encode it; the tool checks this, and if it cannot, pick WebP instead.
Presets for common jobs
If you do not want to think about settings at all, the free image compressor has six one-tap presets. Each sets the goal, format, size and metadata together, and the tool remembers your last settings on your device.
Website
Smaller, modern files for pages that load fast. Pair it with the Blog 1200 width.
Product photo
Sharp product shots with a clean background for shops and marketplaces.
Social upload
Social 1080 width, so the platform does not resize it badly again.
Email attachment
Email 800 width, so ten photos fit in one message.
Form upload (≤50 KB)
For exam, visa and job portals with strict limits.
Private sharing
Removes all metadata, including the GPS location, before you send a photo.
How to compress an image on a phone
The Orixiva image compressor runs in the mobile browser too, so you do not need to install an app. On iPhone or Android, open the page in Safari or Chrome, tap Choose images, and pick from your gallery. Choose the target, then tap the download button and save to Files or Downloads.
Two phone-specific tips:
- iPhone HEIC photos: iPhones often save photos as HEIC, which many forms reject. When you pick a photo in Safari, the iPhone usually hands it over as JPG; set the output format to JPG anyway so the result is always accepted.
- Screenshots: phone screenshots are large PNGs. Converting them to JPG or WebP with the compressor often cuts them by 80–90%.
Compressing many images at once
The compressor handles up to 40 images in one go and downloads them as a ZIP. For hundreds of photos, renaming, folders and CSV reports, use the bulk image resizer, which applies the same “max size per image (KB)” limit to a whole folder. If you are not sure how big your pictures are now, check them first with the image dimension analyzer.
Mistakes that make compressed images look bad
Squeezing quality instead of size
Forcing a 4,000-pixel photo into 20KB by quality alone gives an ugly, blocky picture. Reduce the width first; small and clean beats large and broken.
Compressing the same JPG again and again
Each JPG save loses a little detail. Always start from your original, not from last week’s compressed copy.
Forgetting to check at 100%
A thumbnail always looks fine. Use the before/after view at 100% or 200% zoom and look at faces and text.
Using PNG for photos
Lossless PNG photos are huge. Use JPG or WebP for photos, and keep PNG for logos, signatures and screenshots.
Uploading private photos to unknown sites
Many online tools upload your file to their server. ID photos and signatures are sensitive. A browser-based image compressor keeps the file on your device.
Your turn: What size limit gave you the most trouble: a 20KB exam photo, a 50KB visa form, a 100KB job portal? Share the limit and the site type in the comments (no personal details), and help other readers find the right settings faster.
Compress your image now, free
Pick 20KB, 50KB, 100KB or your own number, and get the best-looking file that fits. No sign-up, no watermark, and your photos never leave your device.
Open the free image compressor → Need a different image tool? Search on orixiva.comImage compression questions people often ask
How do I compress an image to 20KB without losing quality?
Some quality loss is unavoidable at 20KB, but you can keep it invisible. Crop away empty space, reduce the width to about 400–600 px, use JPG, and remove metadata. Then let the tool pick the highest quality that fits.
Why is my image still over 50KB after compressing?
Usually the dimensions are too large for the target, or the quality floor stops the tool going lower. Reduce the width, or tick “Allow smaller dimensions to reach the target” so the tool can shrink it a little.
How do I compress image to 100KB in JPG format?
Choose Exact file size, tap 100 KB, set the output format to JPG, and keep metadata removal on. A width of about 1,200–1,600 px usually fits under 100KB with good quality.
Is it safe to use an online image compressor?
It depends on the tool. Many upload your image to a server. The Orixiva image compressor processes the file in your browser, so the image is not uploaded or stored anywhere.
Does compressing an image reduce its dimensions?
Not unless you ask it to. The tool first lowers quality within your limits; it only reduces dimensions if you set a width or allow smaller dimensions to reach the target.
What is the difference between KB and KiB?
Strictly, 1 KB is 1,000 bytes and 1 KiB is 1,024 bytes. Upload forms are not always clear about which they mean, so aim a few KB below the limit to be safe.
Can I compress PNG files to a smaller size?
Yes. PNG smart reduces the number of colours (up to 256), which works very well for logos and screenshots. For photos saved as PNG, converting to JPG or WebP shrinks them much more.
Does the compressor remove GPS location from photos?
Yes, by default it removes all metadata, including GPS. You can also choose “Keep, but remove GPS location”. For a full check of what a photo contains, use the EXIF remover tool.